Step-by-Step Guide to Making Pumpkin Pie Bars
1. Preheat and Prepare
Start by preheating your oven to 325°F (163°C). Line a 5×5-inch (or a similarly sized) baking dish with parchment paper, ensuring there’s an overhang on two opposite sides. This will make it easier to lift the bars out once they’re baked and cooled.
2. Make the Crust
In a small bowl, combine the graham cracker crumbs, melted butter, and granulated sugar. Mix until the crumbs are evenly coated with the butter and sugar. Press this mixture into the bottom of the prepared baking dish, forming a firm, even layer. This crust will provide the perfect crunchy base for your pumpkin filling.
3. Prepare the Filling
In another bowl, whisk together the pumpkin puree, sweetened condensed milk, egg yolk, ground cinnamon, ground nutmeg, ground ginger, and salt. Make sure the mixture is well combined and smooth. Pour the filling over the graham cracker crust and spread it evenly, ensuring it reaches the edges of the dish.
4. Bake to Perfection
Place the baking dish in the preheated oven and bake for 20-25 minutes. The filling should be set but still have a slight wobble when gently shaken. This slight wobble ensures that the bars will have a creamy, custard-like texture once they cool.
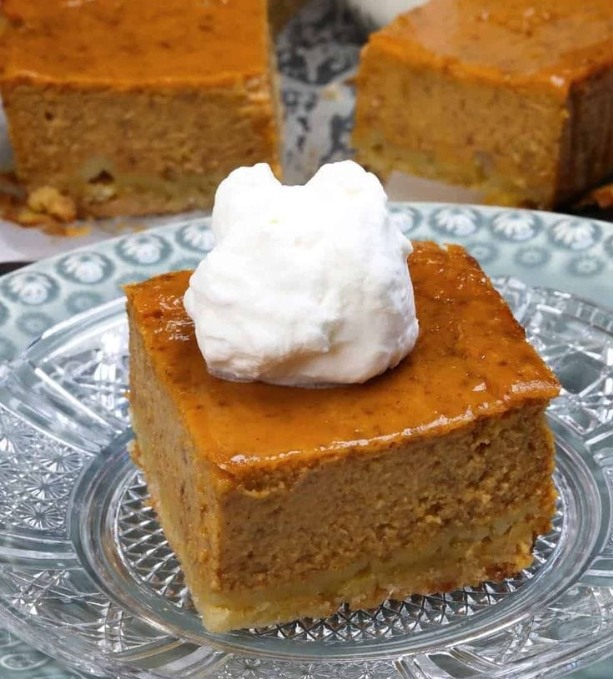
5. Cool and Serve
Once baked, allow the pumpkin pie bars to cool completely in the dish. After cooling, use the parchment paper overhang to carefully lift the bars out of the dish. Transfer them to a cutting board and slice them into squares. Top each bar with a dollop of whipped cream for an extra touch of indulgence.
Pumpkin Pie Bars Variations
The beauty of pumpkin pie bars lies in their versatility. Whether you’re looking to switch up the flavors or cater to specific dietary needs, there are plenty of ways to customize this recipe.
1. Gluten-Free Pumpkin Pie Bars
For a gluten-free version, simply swap out the graham cracker crumbs for gluten-free graham crackers or a gluten-free cookie crumble. The rest of the recipe remains the same, ensuring that everyone can enjoy these tasty treats.
2. Keto Pumpkin Pie Bars
To create a low-carb, keto-friendly version of these bars, substitute the graham cracker crumbs with a mixture of almond flour and a low-carb sweetener like erythritol. You can also replace the sweetened condensed milk with a keto-approved condensed milk substitute, which is typically made with heavy cream and a sugar-free sweetener.
3. Dairy-Free Pumpkin Pie Bars
If you’re avoiding dairy, use a dairy-free butter substitute for the crust and replace the sweetened condensed milk with coconut milk or another dairy-free alternative. The result is a creamy, spiced bar that’s just as delicious as the original.
4. Spiced Pumpkin Pie Bars
For those who love a little extra spice, consider adding a pinch of cloves or allspice to the filling. You can also increase the amount of cinnamon, nutmeg, or ginger for a more robust flavor profile.
Storing and Serving Pumpkin Pie Bars
Pumpkin pie bars are best served fresh, but they can also be stored for later enjoyment. Here’s how to keep them tasting their best:
1. Storing in the Refrigerator
Once cooled, store the bars in an airtight container in the refrigerator. They will stay fresh for up to 3-4 days. The crust may soften slightly over time, but the flavors will remain just as delightful.
2. Freezing Pumpkin Pie Bars
If you’d like to make these bars ahead of time, they freeze well too. Wrap each bar individually in plastic wrap and place them in a freezer-safe container. They can be stored in the freezer for up to 2 months. When you’re ready to enjoy them, simply thaw the bars in the refrigerator overnight.
ADVERTISEMENT
